With the 20% off one item coupon I get it for less than 50 bucks so I get some of these too.
I didn't know how big this was in the box so I ended up tying it to the seat with a bungee to get it home. Now as you can tell I like things on the cheap and this is no exception so I needed an oven to cook my parts in sooo I recycled an old toaster over that stopped working at home because the switch that says the door is closed stopped talking. But low and behold if you put it on its back the thing works great. This a good size for small items like I hope to be doing but I am working on a bigger oven so look for that later.
 | |||||||
| A hanging hook and baking thermometer |
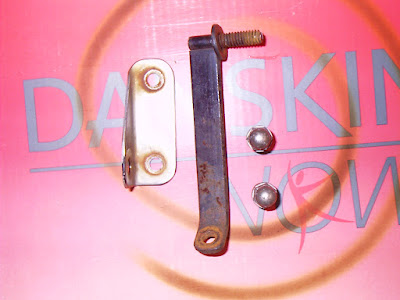
I found some test parts in my scrap box and took them apart to clean and prep. It is a hinge to a wind defector that goes on the side of the goldwing faring. Like this one.
It was in kind of ruff shape.
But after some time on the wire wheel it was ready to wipe down and powder.
I wired up the parts and used some painters tape to protect the threads on this one piece and put them into my powder booth.
I told you I liked it on the CHEAP!
You can see that I have the grounding clip on the outside of the booth. I did this so I wouldn't get the bloody powder all over it. This stuff is like copier toner or dust it goes everywhere with very little help.
Here is my first pointer to anyone who wants to do this wear a mask! Second, use some type of air filter vacuum system to control the powder that wants to waft out of the booth. The basic procedure for doing this is that the part is electrically grounded to the powder coating power supply with the grounding clip. I used stiff copper wire stripped from some romex wire I had to make all the hanging hooks. The powder is put into a cup (use a funnel to pour in the powder) which is attached to the gun. Then a small amount of air (I used 15 psi) is fed into the gun. There is a very thin metal rod running down the center of the gun which positively charges the powder as it forced down the gun and onto the metal part. While you pull the trigger the air siphons out the powder from the cup and forces it down the tube while doing this you step on the power supplies switch/pedal turning on the 1 jiga watt of power. Be careful not to get the gun tip to close to the part or it will arch over messing up the powder.
 |
| Gun loaded and ready to powder |
Using the mat black the parts start to turn grey as you apply the powder.
Once they were uniformly covered I placed then into my preheated toaster oven. Now it is very important to get a baking thermometer and to test your oven. When I had my oven set to 400* f the temp was really 500* f which would have been too hot. Also read the curing instructions for your powder. This said to cure for 15 to 20 minutes AFTER the part was entirely shiny meaning the powder was melted. I timed mine with an egg timer from the dollar store, yep one dollar. When I was done I opened the door a crack to let them slowly cool to room temp. Here's what I got.
What I found interesting is that the powder doesn't fill in any of the surface imperfections so if you want it really smooth fill it with something that can stand the 400* f temps of curing. Will bondo do that?? By the way I left the painters tape on during curing which didn't seem to be to affected by the temp. Well there you have it my first powder coating. They look pretty good I think.
I will take your unwavering admiration in the form of emails, letters, cash donations, and pledges. No personal checks or hate mail as my inbox is full.
Thanks for spending the time to read this.
It is better to BURNOUT than FADE AWAY!
Glen


Hi, I was wondering,what brand of powder coat paint would you recommend?
ReplyDeleteHello Sara.
ReplyDeleteSorry but I have only used the Harbor Freight stuff but it seems to do an OK job I guess. Thanks for stopping by.
Ok! Thank you for the prompt reply!
ReplyDeleteLooks like a successful first job. I started out using a wire wheel to prep parts as well but I noticed the durability was lacking. It helps to roughen up the part with some sandpaper after you get all of the old coatings off with the wire wheel. I eventually switched to blasting and noticed a huge improvement. I have a website with a bunch of powder coating tips for beginners, should be a good read for a guy like you that is just starting out. http://www.powdercoatguide.com/
ReplyDeleteThank you for sharing your thoughts of what to do in first power coating. I should canvas of where is the best place to buy powder coating supplies.
ReplyDelete